On Premise Installation
This page relates to Release 4.9.28.68 and later. The installation routine in the package of previous versions may vary slightly
Follow these steps when installing on premise on a single server or multiple servers.
There are separate instructions for other scenarios such as M-Files Cloud, or Manual installation.
Step by step installation Guide
1. Run Installation Package on the M-Files Server
2. Confirm the license agreement
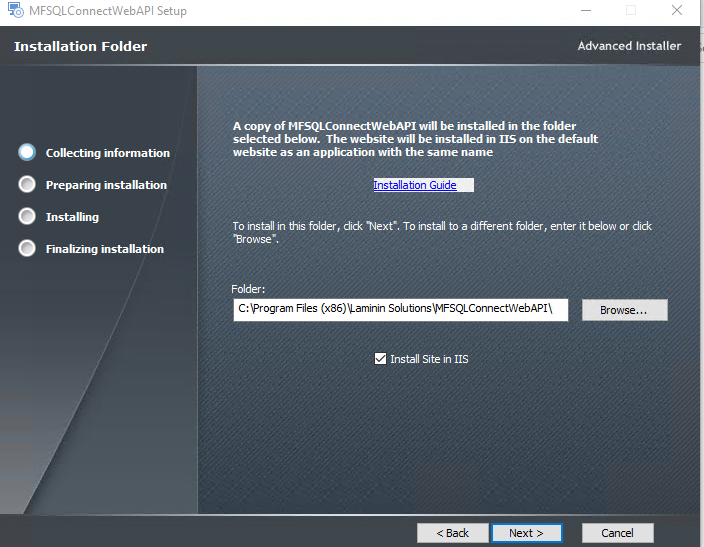
3. Select installation folder.
We recommend to use the default. Selecting a different folder will require additional steps. The installation folder will contain the installation files for the specific to the Vault and Database being implemented. Accept default, or browse to desired folder
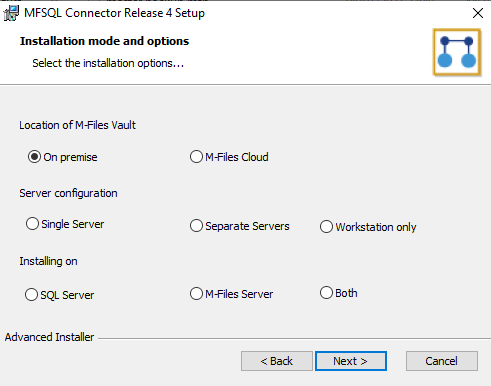
4. Select the installation mode and options.
The installation could be on a single server with both M-Files and SQL on the same server, or separate servers for M-Files and SQL.
Follow separate instructions for the other options such as M-Files cloud and workstation only.
The final selection to make is if the installation is targeted for M-Files or SQL or Both at the same time.
It is not possible to implement Both servers at the same time in a separate Server configuration.
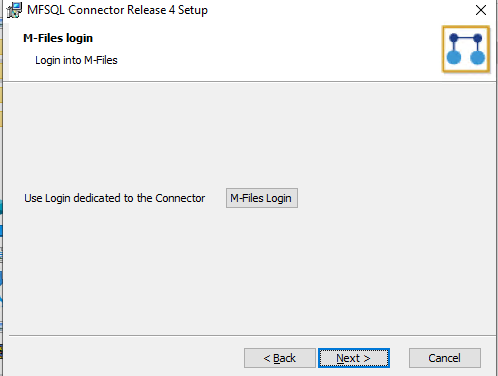
5. Log into M-Files.
The selected options will determine if the package will prompt logging into M-Files.
Log into M-Files to connect to the M-Files Vault. This interface will place a installation file on the local machine to recognize the installation credentials the next time when the installation is run on the local machine.
The credentials used as login will be used by MFSQL Connector to access the vault for all future operations. The credentials can be changed at any time using SSMS or by rerunning the installation package.
On occasion the M-Files login button is unresponsive, or crashes. This is likely because the installation references an vault that is no longer available or the installation history file is corrupt. In this case, simply remove the history file by deleting the entire folder: C:\Users\[windowsuser]\AppData\Local\MFSQL Vault Install.
Get the vault installation error log at C:\Users\[windowsuser]\AppData\Local\MFSQL Vault Install\ErrorLog.txt
On repeated installation on the same machine for the same vault and database does not require you to log into M-Files again. The settings will be picked up from the local machine. If multiple vaults are installed from the machine, or if it is the first time installation then logging in is required.
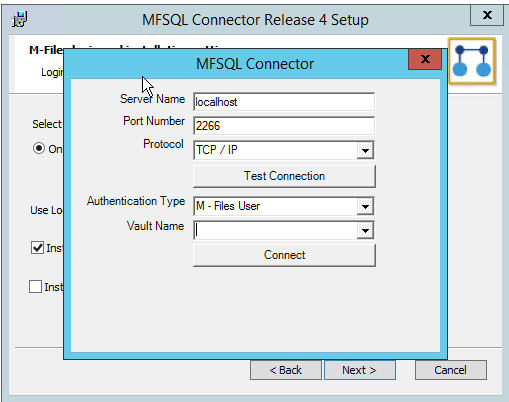
When selecting the login button on a new installation the following window will prompt for accessing the M-Files Server.
6. Enter credentials for M-Files Server
Use the user credentials that is designated for MFSQL Connector to log into the M-Files. This user should have M-Files System admin rights and Vault Admin rights. System admin right may be removed after the installation is completed.
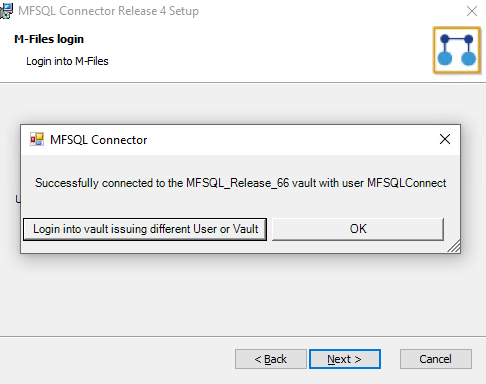
6.1 Select another vault to log into.
After the first installation the package will automatically prompt for in the window to accept the previously used credentials or log into another vault.
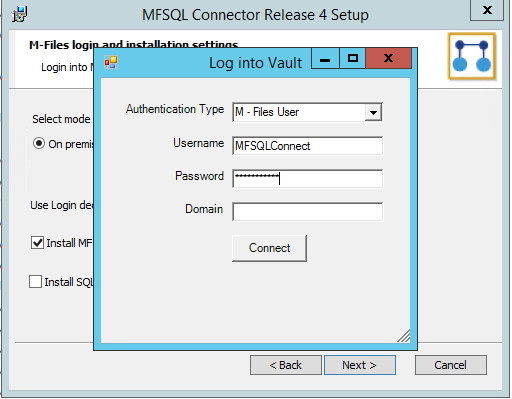
7. Log into the vault.
Click the down arrow to select the vault, this will prompt with next window to log into the vault. Use the MFSQL user for the credentials.
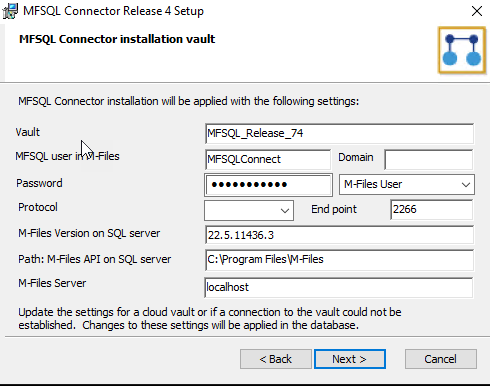
8. Confirm M-Files login credentials.
After updating the connection to the vault, click next. The following window will show the credentials that will be applied in the installation.
Normally, this is for confirmation only. In some cases it may be necessary to enter or update the credentials in this window:
Note the user and protocol drop downs are intentionally blank. They should only be selected if a change is required.
this is where the credentials are entered for a cloud installation.
when the current windows user was used to log into the vault, it would be necessary to enter the username and password again in this window
when the installation package are unable to use Powershell to access the installation settings, the user can reset the credentials in this window
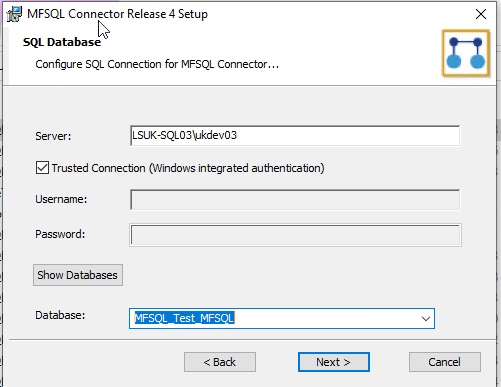
9.Log into SQL Server and database.
Click next to open the SQL login window. Login into the SQL server with sysadmin credentials. The server name must include the SQL Server \ Instance. Add the server port if a non standard port are used.
Click show databases to verify the name of the MFSQL connector database. Alternatively, type in the new name of the target MFSQL Connector database. We recommend using MFSQL_ as the prefix and the name of the vault as the suffix.
The installation will automatically create the database if it does not exist.
Warning
Do not install MFSQL Connector into the M-Files SQL database. Always use a separate database with a distinct naming convention.
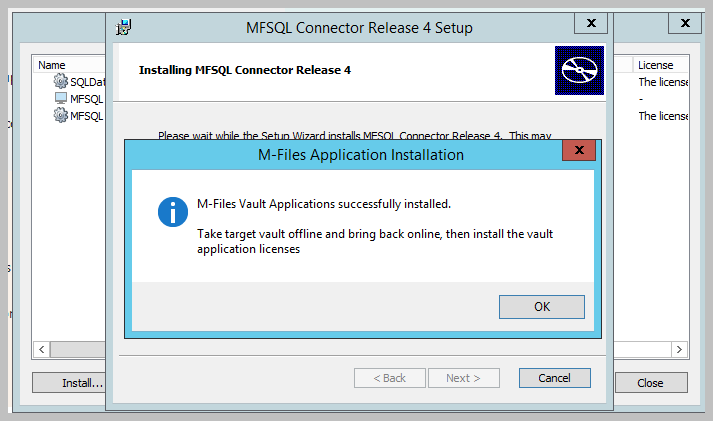
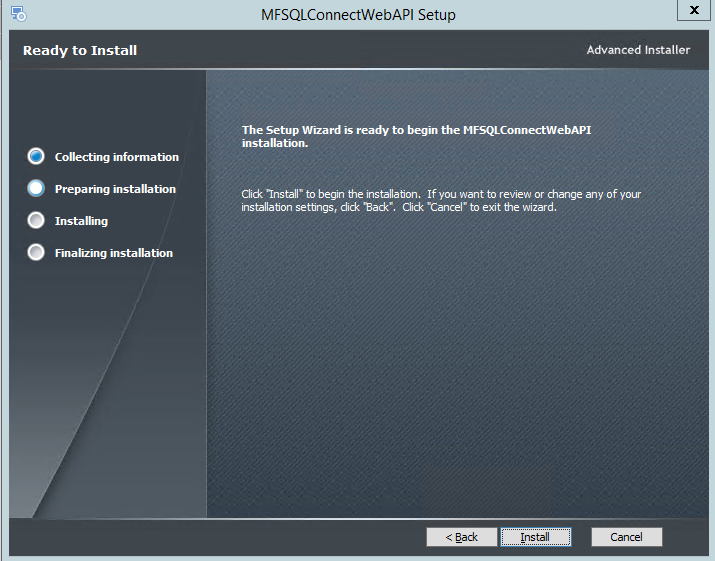
10. Installing.
The installation will proceed through a number of steps. On completion of the installation a message box is shown to remind you to take vault offline and bring back online before proceeding if the installation option is to install on the M-Files Server.
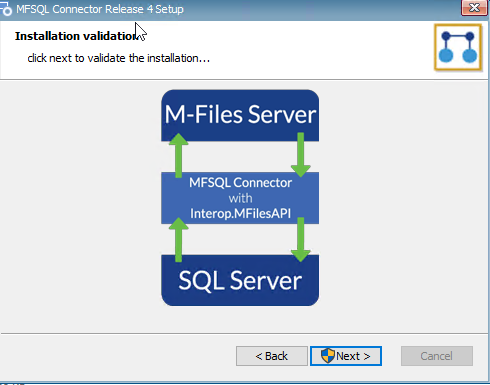
11. Validate SQL installation and vault connection.
If the installation option is selected for installing on the SQL server then a SQL installation validation will take place. If no errors are found then the following window will show.
12. SQL Errors.
Two types of errors may be reported.
Unable to connect to the M-Files Server. If this happens, check the credentials, and rerun the package installations
Assemblies are unable to install. Contact support. This is indicative of a underlying issue with the installation.
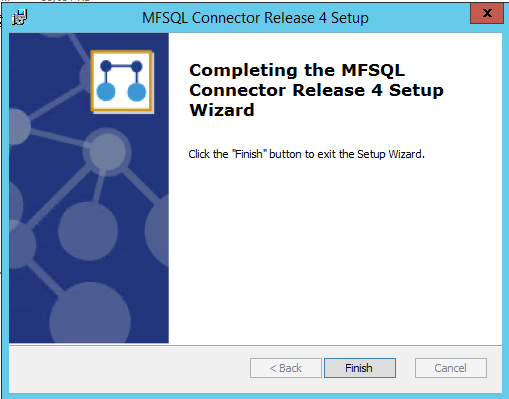
13. Finish.
If no errors are found, finish the installation of the package.
14. Configure M-Files server
In the case of selecting the option for an M-Files server installation, additional steps are required to complete the installation. Use M-Files Admin to complete the following on the M-Files Server.
Access the Applications window using M-Files Admin. The following configuration should be apparent in the Vault
The Vault application: MFSQL Connector Vault App. Take the vault offline and back online to complete the installation of the vault application.
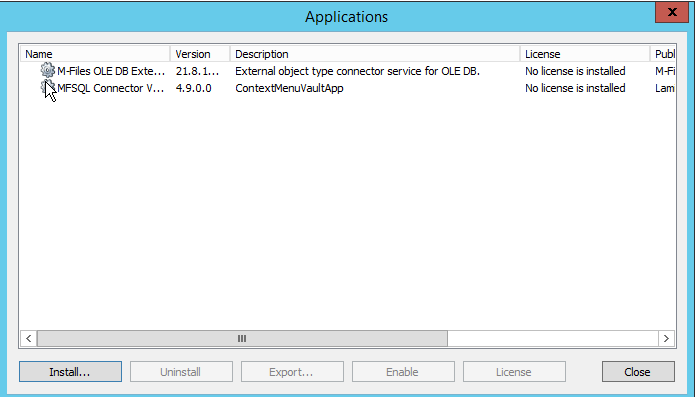
The configuration of application is under the Other Applications. Refer to Installing the Context Menu to configure the vault application for the use of Context Menu functionality. As the minimum, the installation should show a valid license and expiry date. If not, proceed to license the application.
15. License the product.
Refer to section on Licensing Management for further detail on licensing the applications.
16. Install content package
In most cases, the content package will be automatically installed. However, refer to Content Package installation for more information on the content package that comes with the Connector.
17. Perform manual installation.
The entirre package can be installed by running scripts and adding the components manually. To perform a manual installation refer to Manual installation using scripts